|
Feb 25, 2009
Dirty Mouth?Yeah, I finally did the pattern for the penis chapstick cozy. I received a surprising amount of requests for it. I'm going to copy and paste it into here. Also...I did manage to make a PDF somehow. I think. But really, I'm not sure how that works exactly. So...it's not online. If you want it, just email me.
Phallic Chapstick Cozy
by ShadkittyNeed a little protection? Grab your penis and put it on your mouth, er, your chapstick that is. This cozy has no functional use whatsoever, but it's HILARIOUS and you'll enjoy it. And, unlike real life, one size fits all!! MATERIALS Caron Simply Soft [100% acrylic; 315yd/288m per 170g skein]; color: Pink; all you really need are some scraps 1 set(s) US #4/3.5mm double-point needles Tapestry needle Fluff Key ring (optional) GAUGE Useless. Just make it work for you. PATTERN NOTES You can attach a keyring if you want to hang this from your keys. Or whatever. Just crochet a chain long enough to meet your standards and attach it to the cozy and the keyring. Use your own smarts for that. PATTERN SHAFT CO 12, leaving a longish tail. Join in round, making sure stitches aren't twisted, yada yada. Do some k2, p2 ribbing for awhile. Periodically slip the work over chapstick tube. When work reaches from the bottom of the cap to the bottom of the tube: K 2 rounds plain Next rnd: *k1, k2tog* Cut yarn and thread through stitches. Pull shut tight – weave end in on side facing you!! Then turn inside out. HEAD CO 18. Join in round, blah blah blah. You know the drill. Round 1: k9 sts together with tail from CO, k9 remaining sts together with tail from body CO. Make sure you leave a little bit of yarn between the body and head. This is the little piece of yarn that connects the two. If you make them too close together you won't be able to get the head off and on easily! Round 2: knit around Round 3: k9, inc, k9, inc Round 4 & 5: knit around Round 6: *k3, k2tog* to end Round 7: knit Rep rounds 6 & 7 until 8sts remain. Next Round: k2tog around Cut yarn and pull through remaining sts. BALLS (make 2) CO 8. Round 1: *k1, kfb* around Round 2: knit Rep these 2 rounds once more (16sts). Work St st for 3 rounds. Next Round: *k1, k2tog* around Next Round: knit Next Round: *k1, k2tog* around Stuff with fluff! Cut yarn and pull through remaining sts. Attach to body using your good judgement and general knowledge of a man's tool. You are now a penii warrior! Battle the forces of chapped lips! FINISHING Ha. I kinda gave most of the finishing details in the pattern instructions. You don't need to really weave in the ends that you knitted together. Just trim them. Weave in any remaining ends. Then pop in your tube of chapstick. ABOUT THE DESIGNER Ms. Kitty is completely bonkers. She lives in a constant state of chaos with her man servant and 3 little critters...amongst piles of yarn and laundry. A menial gas station employee by day, and a fiendish knitting powerhouse by night, there is no knitting challenge too great! I'm getting carried away, go show off your knitted penis. Labels: chapstick, cozy, pattern, penis 10:07 | | 
|
Aug 12, 2008
Garden of EdenI've been promising this pattern for awhile. Only two of the sizes have been tested (sorry), so let me know how the large size works for those of you who make it. Also, if you make, or model these pasties and don't mind me posting a picture, please email me!
Garden of Eden
by Shadkitty
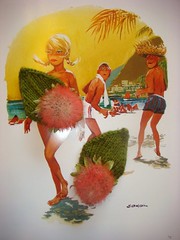 Silky leaf shaped pasties in three sizes. SIZES [M, L] (shown in size S) FINISHED MEASUREMENTSWidth: 2 [2.5, 3] inches
MATERIALSCascade Pima Silk [Cotton, Silk ; 109yd/100m per 50g skein]; color: 5144; 1 [1, 1] skein 1 set(s) US size 4/3.5mm straight needles notions required Tapestry needle Stitch markers Lining fabric in matching color (optional) GAUGE24 sts/32 rows = 4" in stockinette stitch PATTERN NOTESUse long tail cast on. PM – place marker (slip all markers as you come to them) SM – slip marker SL – slip purlwise
PATTERNMake 2 CO 3[5, 5] sts. Place stitch markers on either side of middle stitch. Row 1 and all odd numbered rows (ws): Purl Row 2 (rs): K to first marker, YO, SM, K1, SM, YO, K to end. Rep for a total of 3 times (3 rows with eyelets). (9, 11, 11 sts) SMALL AND MEDIUMRow 8: K to first marker, M1, SM, K1, SM, M1, K to end (11, 13 sts) LARGE ONLYRow 8: K1, M1, K3, M1, K1, M1, K3, M1, K1 (15 sts)
BOTH SIZESRepeat Row 8 2[3, 4] times more for a total of 15[19, 23] sts From this point, on all right side rows slip stitch between markers. Purl as usual on wrong side rows. Next row: K to marker, SM, SL1, SM, K to end Next row: *SSK, K to marker, SM, SL1, SM, K to the last two stitches, K2tog * Rep from * to * until 3 sts remain. Remove all markers. Slip 2 together as if to knit, K1, pass both slipped stitches over knitted stitch. Pull yarn through.
FINISHINGWeave in all ends and block to size. Sew on lining if desired, or let your nips play peek-a-boo! Embellish if desired. Labels: leaf, pasties, pattern 20:15 | |
|
Dec 16, 2007
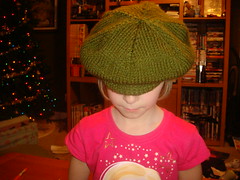
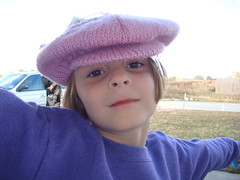
Buggerloo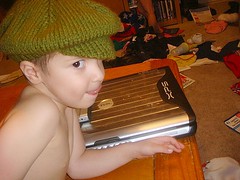 This simple cabbie (or newsboy) style hat was created on a whim for my middle son, who I decided needed a hat just like this. However, I couldn't find a pattern that I liked. Then, my daughter wanted one. Now I want one too. They are too cute, and too quick. Short-rows help create a nice round, clean shape to the brim, while the hat is a simple slouchy style hat. Modeled after the latest trends and my favorite hats. This simple cabbie (or newsboy) style hat was created on a whim for my middle son, who I decided needed a hat just like this. However, I couldn't find a pattern that I liked. Then, my daughter wanted one. Now I want one too. They are too cute, and too quick. Short-rows help create a nice round, clean shape to the brim, while the hat is a simple slouchy style hat. Modeled after the latest trends and my favorite hats.
Buggerloo just happens to be one of a ton of variant nicknames I have for my son. This hat fits him perfectly...now only if I could get him to wear it!
SIZE
Small (toddler), Large (child, small adult)
FINISHED MEASUREMENTS
18" (20")
MATERIALS
(Small hat) Lion Brand Vanna's Choice (100% acrylic; 170yds/155m per 100g skein]; color 174: Olive; 1 skein
(Large hat) Ella Rae Amity (75% acrylic, 25% wool; 200yds/183m per 100g skein]; color 45; 1 skein
16" length-inch US 7/4.5mm circular needle
16" length-inch US 9/5.5mm circular needle
1 set US 9/5.5mm double-point needles
crafting plastic
tapestry needle
stitch markers/waste yarn
GAUGE
18 sts/24 rows = 4" in stockinette stitch (on larger needles)
PATTERN NOTES
w&t: wrap and turn, bring yarn to front of work between needles, slip next st to right-hand needle, bring yarn around this st to back of work, slip st back to left-hand needle, turn work to begin working back in the other direction.
For the brim, I purchased uncut craft painting stencil sheets. These can be found at Wal-Mart and chain craft stores.
If you would like a looser hat, knit longer before beginning decreases.
PATTERN
 Hat Hat
Using smaller needles, CO 72 (90) sts. Join in round, being careful not to twist, place marker to indicate beginning of round. Work 1x1 rib for 1 inch.
Switch to larger needles, *k2 (3), M1*; rep from * to * til end of round. [108, 120 sts]
Work in St st until piece measures 4 (5) inches from cast-on edge.
Next Rnd: *k18 (20), place marker*, rep from * to * 5 more times
Dec Rnd 1: *k2tog, knit to 2 sts before marker, ssk, slip marker*, rep from * to * 5 more times
Dec Rnd 2: knit around
Repeat dec rnds 1 and 2 until 24 sts remain (switching to DPNs when necessary), then work rnd 1 once more [12 sts]. K2tog around [6 sts], break yarn and thread through sts. Pull tight.
Brim
Locate join on cast-on edge, using larger needles pick up 12 (15) sts on each side of the join. [24, 30 sts total]
Small Only
Row 1 (WS): Purl across
Row 2 (RS): K 22, w&t
Row 3: P 20, w&t
Row 4: K 19, w&t
Row 5: P 18, w&t
Row 6: K 17, w&t
Row 7: P 16, w&t
Row 8: K 15, w&t
Row 9: P 14, w&t
Row 12: K 13, w&t
Row 11: P 12, w&t
Large Only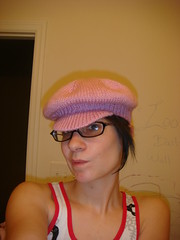
Row 1 (WS): Purl across
Row 2 (RS): K 28, w&t
Row 3: P 26, w&t
Row 4: K 25, w&t
Row 5: P 24, w&t
Row 6: K 23, w&t
Row 7: P 22, w&t
Row 8: K 21, w&t
Row 9: P 20, w&t
Row 10: K19, w&t
Row 11: P18, w&t
Row 12: K17, w&t
Row 13: P16, w&t
Row 14: K15, w&t
Row 15: P14, w&t
Row 16: K13, w&t
Row 17: P12, w&t
Both Sizes
Next Row: Knit across, picking up next 4 (7) wraps and knitting them together with 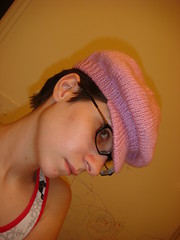 wrapped stitches as you go. For last wrapped stitch, pick up wrapped stitch, then slip wrap, wrapped stitch, and last stitch - knit through back loops. wrapped stitches as you go. For last wrapped stitch, pick up wrapped stitch, then slip wrap, wrapped stitch, and last stitch - knit through back loops.
Next Row: Purl across, purling next 4 (7) wraps with their wrapped stitches when you come to them. For last wrapped stitch, pick up wrapped stitch and p3tog (wrap, wrapped stitch, and last stitch)
FINISHING
Cut plastic to fit into brim (keep in mind that the stitches have a bit of stretch). Weave ends (from cast on and brim join) into brim. Place plastic and graft live stitches to cast-on edge, making sure to keep plastic in place. Weave in remaining ends.
Oh Snap!! Now you have a super rockin hat, go pimp it and see how many people ask you where you bought it!
 Labels: Buggerloo, hat, pattern 01:26 | |
|
Nov 27, 2007
Oh GeeWow. Where do I begin?! Normally, I'd say "at the beginning", but I am not even sure where that is. Let us work backwards then, shall we?
 Crap. I just somehow managed to delete my entire post about Thanksgiving. And I didn't really feel like writing this in the first place. So just...enjoy the mosiac. I'll give you some details about my Mouse encounter and the Harlot's Unoriginal Hat (which I revamped ever so slightly to work with a worsted weight yarn instead 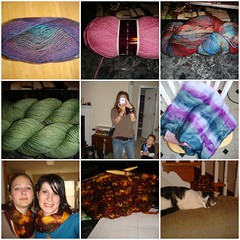 of bulky). Oh, and of course, as always, lots of pictures. Whilst in Georgia with my family, I visited with Mouse! Not even sure I mentioned I'd be doing that on here. If you don't already read her blog, she is totally awesome. We talk pretty regularly and I am convinced we share a brain. lol Really, it's a little scary sometimes. Our first attempt to get together was thwarted by a freak illness! The little Ky bug got a horrible fever the day before I was to meet up with Mouse. We just rescheduled though. So, I went to the House of Mouse (sorry, I had to) and we hung out. She showed me all her super amazing soaps, and scented oils, and jewelry...and I think I almost died. She gave me some super cute stitch markers that I apparently forgot to *gasp* photograph! A Converse sneaker and a little devil ducky! SQUEE! Then we went to a yarn shop, oh, it was so much fun. Too bad the Crazies were shopping as well. And wanted all of the expensive stuff. I might have walked out with some things. Malabrigo may have hopped into my basket. Possibly. I can't be sure. It hopped onto the needles so fast that I am still not sure. That whole bottom row on the pictures is Malabrigo pics.  You may (or may not) have noticed that the Unoriginal Hat is what I decided to use my Malabrigo for. Actually, it was what I picked the yarn out for. Except...the hat is written for bulky weight, and this is a worsted weight. After toying with the idea of leaving it in the skein and using the skein as a scarf (I wore it like that almost the entire time I was at Mouse's), no, I decided I must actually knit with the famed yarn. After swatching, and doing some maths I CO using size 9 needles. Then...about 5 rows into the pattern, I realized that the cables weren't looking at ALL the way I wanted them to. Nope, nope. So I did what any crazy good knitter would do. I re-charted the cable. That's what you would do, right? Right?! lol Even though I had to do a lot of tinking (yeah...at first I just re-charted in my head, then I realized I might actually need to write it down), I love the finished product. Here is the low-down:  Pattern: Unoriginal Hat by Stephanie Pearl-McPhee Yarn: Malabrigo Merino Worsted in Loro Barranquero Needles: Size 9US/5.5mm Gauge: 16sts over 4" in cable pattern Notes: There are a lot of these, bear with me. I loved this hat. I might do it again with the proper yarn weight. Anyways, I decided originally to add in a few purl stitches and add an extra repeat of the cable. 16sts x 5 reps = 80 So I CO the 80sts and got to work. Then I realized that the one cable wasn't opening up as wide as it did in The Harlot's hat, which is what I had wanted. That was really my favorite part. Tink back, twist a stitch here, one there, ah, much better. Knit a few rows...and now the other cable isn't looking quite the way I'd like. *sigh* At this point I decide to print out some graph paper and chart what is going on in my head. It's very late at this point. I had just gotten back from Mouse's, then hand wound the yarn (singles can be tricky, they don't like ball-winders), and I had dinner of course. By the time I re-chart the pattern, it's far past 1AM. Off to bed I go, but I have a plan now and that hat will be gettin it, oh yeah. As you can see, the chart worked beautifully. If you would like...I can write down the chart row by row...or maybe I'll find a scanner and scan it in. Really, all I did was add in 4 extra rows, and 2 extra stitches.  When I got home there was plenty of mail. To include two skeins of STR, the new Raven Clan...like I was going to be able to resist it. They are Rook-y and Corbie. I am really happy with Rook-y, which is good, because I had been eyeing it for awhile. 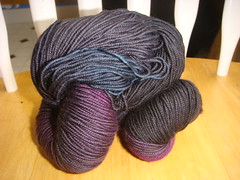  Labels: blogging, busy, family, finished object, food, friends, hanging out, hat, knitters, life, mouse, pattern, pictures, purchases, rambling, updating, vacation, wool/fleece/roving, yarn 13:59 | |
|
May 15, 2007
Norwegian Baby Hat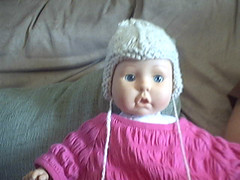 Alright, I had written a whole lovely explanation of what happened with the baby hat. And then my computer DIED. Isn't that awesome? So, I'm gonna write it all down on paper and then add the pattern to here. Does anyone know of a baby who needs a hat? The one I made is newborn sized, and Nolan isn't quite so little now. He's 9 months old now! Can you believe it? Maybe I'll make another one for him out of some sock yarn. If not, I'll make one out of sock yarn for the Q2 challenge. I'm just worried about sending handspun wool to a place that might not be able to take proper care of it. :D Alright, I had written a whole lovely explanation of what happened with the baby hat. And then my computer DIED. Isn't that awesome? So, I'm gonna write it all down on paper and then add the pattern to here. Does anyone know of a baby who needs a hat? The one I made is newborn sized, and Nolan isn't quite so little now. He's 9 months old now! Can you believe it? Maybe I'll make another one for him out of some sock yarn. If not, I'll make one out of sock yarn for the Q2 challenge. I'm just worried about sending handspun wool to a place that might not be able to take proper care of it. :D
Materials:
Heavy worsted weight yarn (approx 50-60yds)
Size 9 DPNs (or size needed to obtain gauge)
Stitch markers
Tapestry needle
Gauge: 4sts = 1"
Sizes: 0-3mos, 2-6mos, 6-9mos, 9-12mos
Finished Measurements: 13", 14", 15" 17"
Pattern Notes:
PM - place marker
DD - slip 2 sts together as if to knit, K1, pass slipped sts over
KLL & KRL - to view videos of these increases look here, you'll have to scroll down
I count the increase as one stitch, seperate from the stitches knitted before and after it. Remember that when counting stitches or you might end up off a stitch.
DIRECTIONS:
CO 53 (57, 63, 69) sts. Join in the round, being careful not to twist. Work in garter stitch for 3/4", ending with a knit round. K 18 (19, 21, 23), PM, K 17 (19, 21, 23), PM, K 17 (19, 21, 23). Markers are to help you remember where to increase, placing a marker for the decreases is (unfortunately) more of a hassle than a help.
Continue as follows:
RND 1: KRL, K 8 (8, 9, 10), DD, K to marker, KLL, KRL, K 7 (8, 9, 10), DD, K to marker, KLL, KRL, K 7 (8, 9, 10), DD, K 8 (8, 9, 10), KLL
RND 2: K around
Rep these two rounds until hat measures 3 (3, 4, 5) inches, remove markers and omit increases in RND 1 after this point. Continue until 5 (6, 6, 6) sts left.
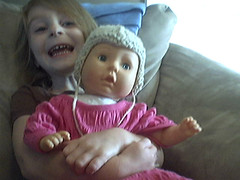 Finishing FinishingBreak yarn and thread tail through remaining stitches using tapestry needle. Weave in ends and promptly chase down some poor infant to model your work! Labels: babies, hat, pattern 19:29 | |
|